Lets say you offer a number of storage locations that VM’s can be deployed to within your organisation or as part of a service offering, for example;
- Gold (Expensive, top of the line)
- Silver (Middle cost and performance)
- Bronze (Cheapest option with low performance)
Wouldn’t it be useful to create a catalog item in UCS Director that gives the end-user the ability to select which storage tier to deploy the VM on?
The good news is that UCS Director has a policy that can be associated with a catalog item.
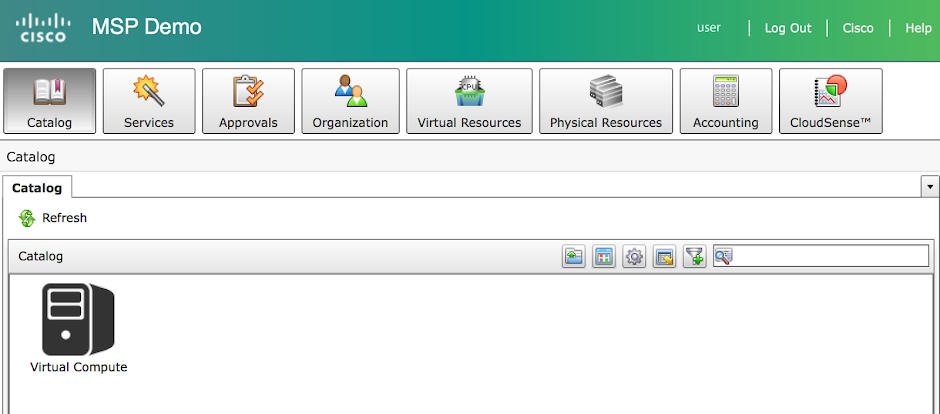
So what does this look like to an end-user? First of all the user would navigate to the correct catalog (in this case ‘Virtual Compute’).
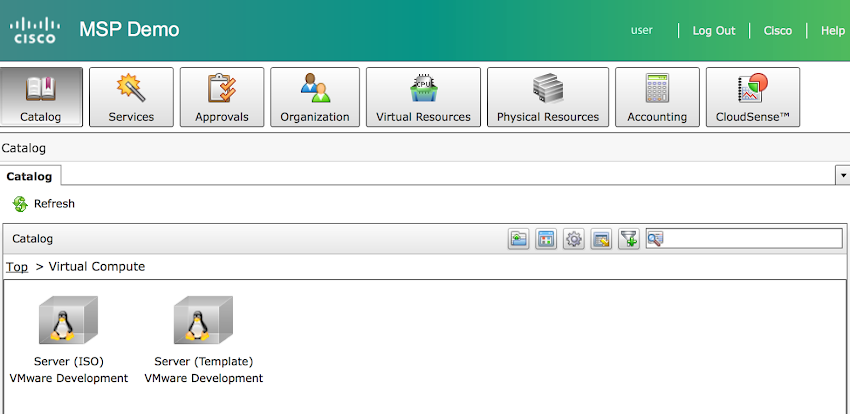
The user would the select the catlog item they want (in this case ‘Server (Template)’);
If the user then goes through the standard wizard when they get to the ‘Custom Specification’ option they will see a ‘Storage Tier’ option drop-down down box that allows for the relevant selection;
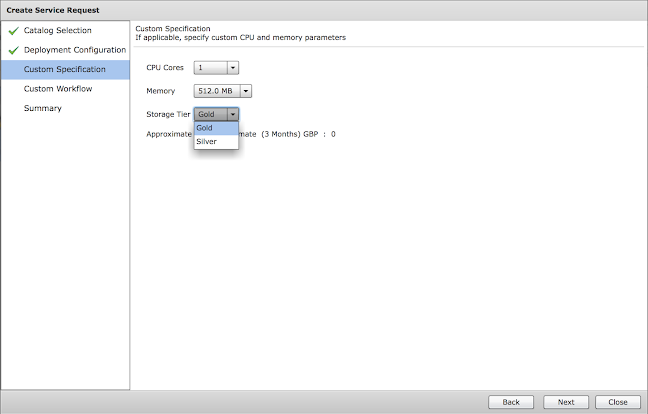
When the service request is submitted the VM will be deployed on the storage that has been configured as part of the selected policy.
Configuration
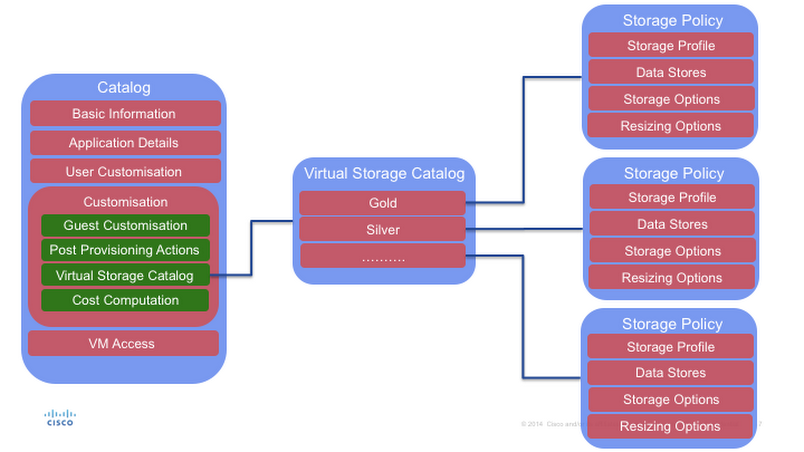
Before showing the details of how to configure this feature its useful to understand how it fits into the bigger picture of policies. As you can see below the VM catalog item is linked to a ‘Virtual Storage Catalog’ which has a configurable number of entries (in this case using the name ‘Gold’ & ‘Silver’). Each of these entries are linked to a specific ‘Storage Policy’ which defines the storage configurations and locations based on what is attached to the underlying hypervisor configuration.
To configure you 1st need to;
- Create Storage Policy (’Policies->Virtual/Hypervisor Polices->Storage->VMware Storage Policy’) using the required storage data store
- Create Virtual Storage Catalog (’Policies->Virtual/Hypervisor Polices->Storage->Virtual Storage Catalog’) with the required number of entries and assign a storage policy to each one.
- The Policy should be applied to a new or existing catalog (’Policies->Catalogs’) under the ‘Customisation’ sections by enabling ‘Virtual Storage Catalog’
An example can be found in the following video (apologies however I have not yet added any sound);